Setup
- Azure AD Sync is an application that sits between Stratsys and Azure AD and enables a one way synchronization from Azure AD to Stratsys.
- It has a swagger!
Prerequisite
In Stratsys:
- The database needs to be migrated. Read more about it here: Migrate customer.
The Azure AD license and groups meets the requirements (see first Note section).
Note
Make sure you have the correct urls for the correct environment. Platform urls in prodution have the format http://[application].svc.stratsys.com. Test urls looks like this https://[application].svc.test.stratsys.net .
Note
If you want to sync users that are already created in the platform, the new and the old user must have matching user name or e-mail. Otherwise, a new user will be created.
Create an organization
- Start by logging in to https://stratsys/companyCode > Administration > Organization and create your organization tree.
- This organization tree should mirror your Azure AD department structure. All departments in Azure AD needs to have a corresponding alias in Azure AD Sync. See Group and department mapping section.
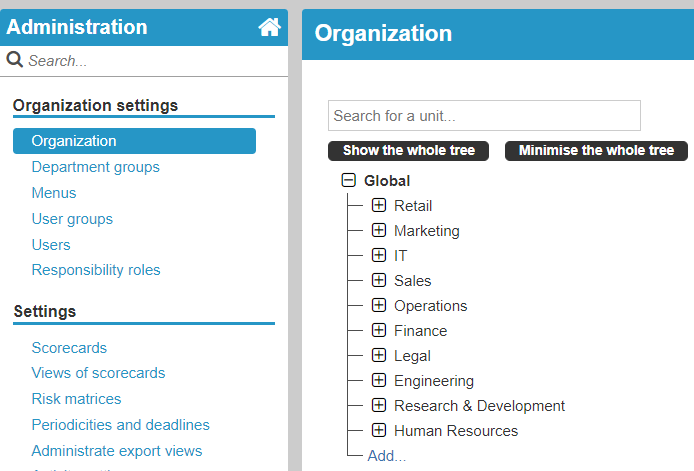
Fig. 1 Stratsys organization tree.
Tip
In this example the organization tree mirrors the Azure Demo Active Directory, which I will use throughout the documentation. Create your own demo here.
Generate a key
- Go to Platform Administration and click User Sync > Settings > Activate directory synchronization.
- Under Keys, write the Company code and click Generate token.
- Copy the key and store it in a safe place, since you won’t be able to retrieve it later.
- Copy the Azure Ad Sync Url , you will need it later.
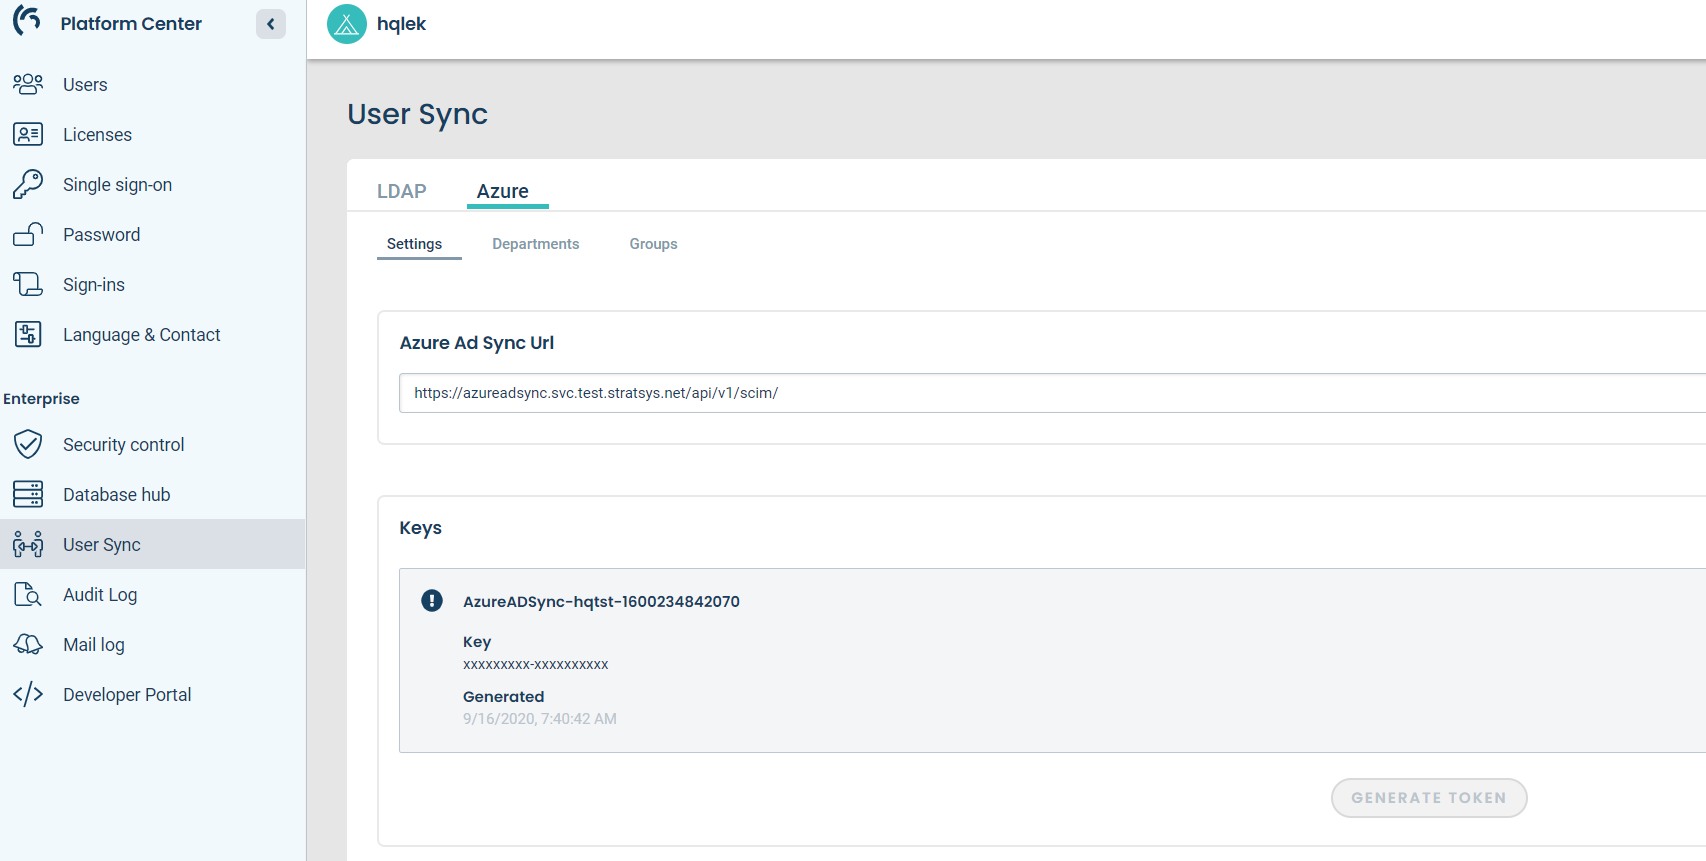
Fig. 2 Generate token.
Create and configure groups
Create
- The groups are created in Stratsys and configured in Azure AD Sync.
- After the groups are created in Stratsys, go to Groups and click Show non-external groups.
- There, all groups from Stratsys are listed. Select the groups you want to use and click Set to external.
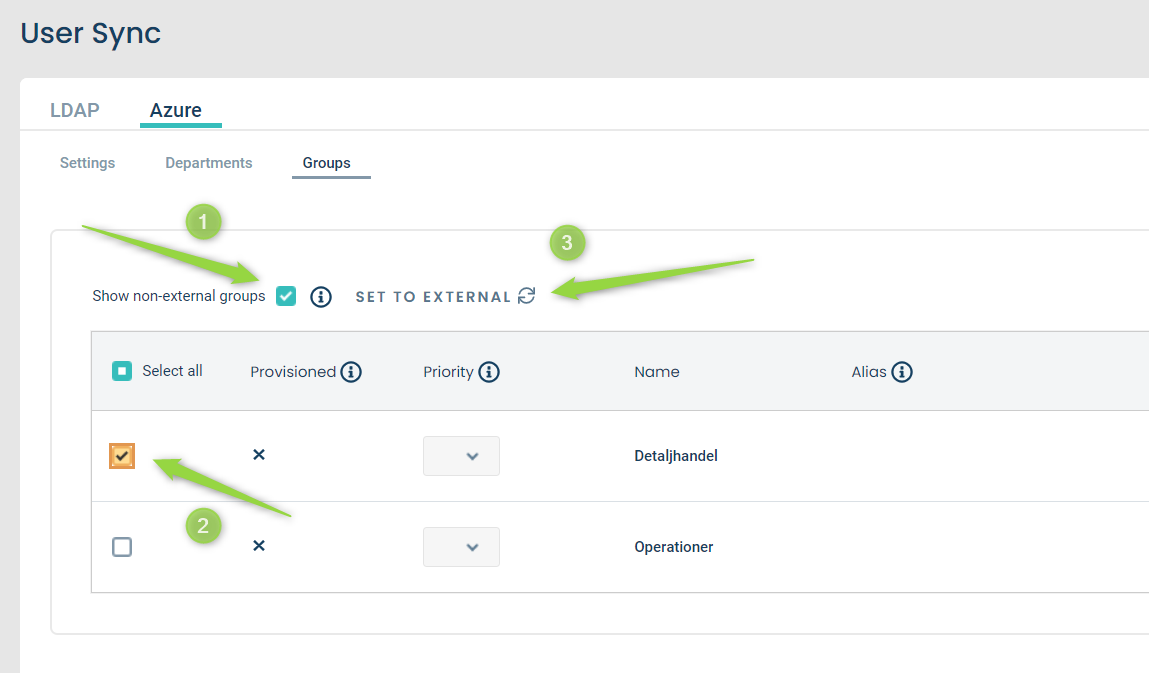
Fig. 3 Add group from Stratsys.
- The groups are listed as a prioritized list. When a user is assigned to a group, the priority determines if this group should be set as main membership or extra membership for this user. The user will get a new membership consisting of the new group and the same department as the main membership.
- Each group also has a department mapped to it. This acts as a fallback when a user is assigned an unexisting department (it might have been misspelled, or simply not created in Stratsys). So if the group is the main membership for the user, its configured department is used.
Configure
- Click on a group to see and edit its configuration.
- All groups in Azure AD needs to have a corresponding alias in Azure AD Sync. If a group doesn’t have an alias, the provisioning of this group will fail.
- The alias is the name of the corresponding Azure AD group. A group can have several aliases and hence map to several Azure AD groups.
- An alias must be unique.
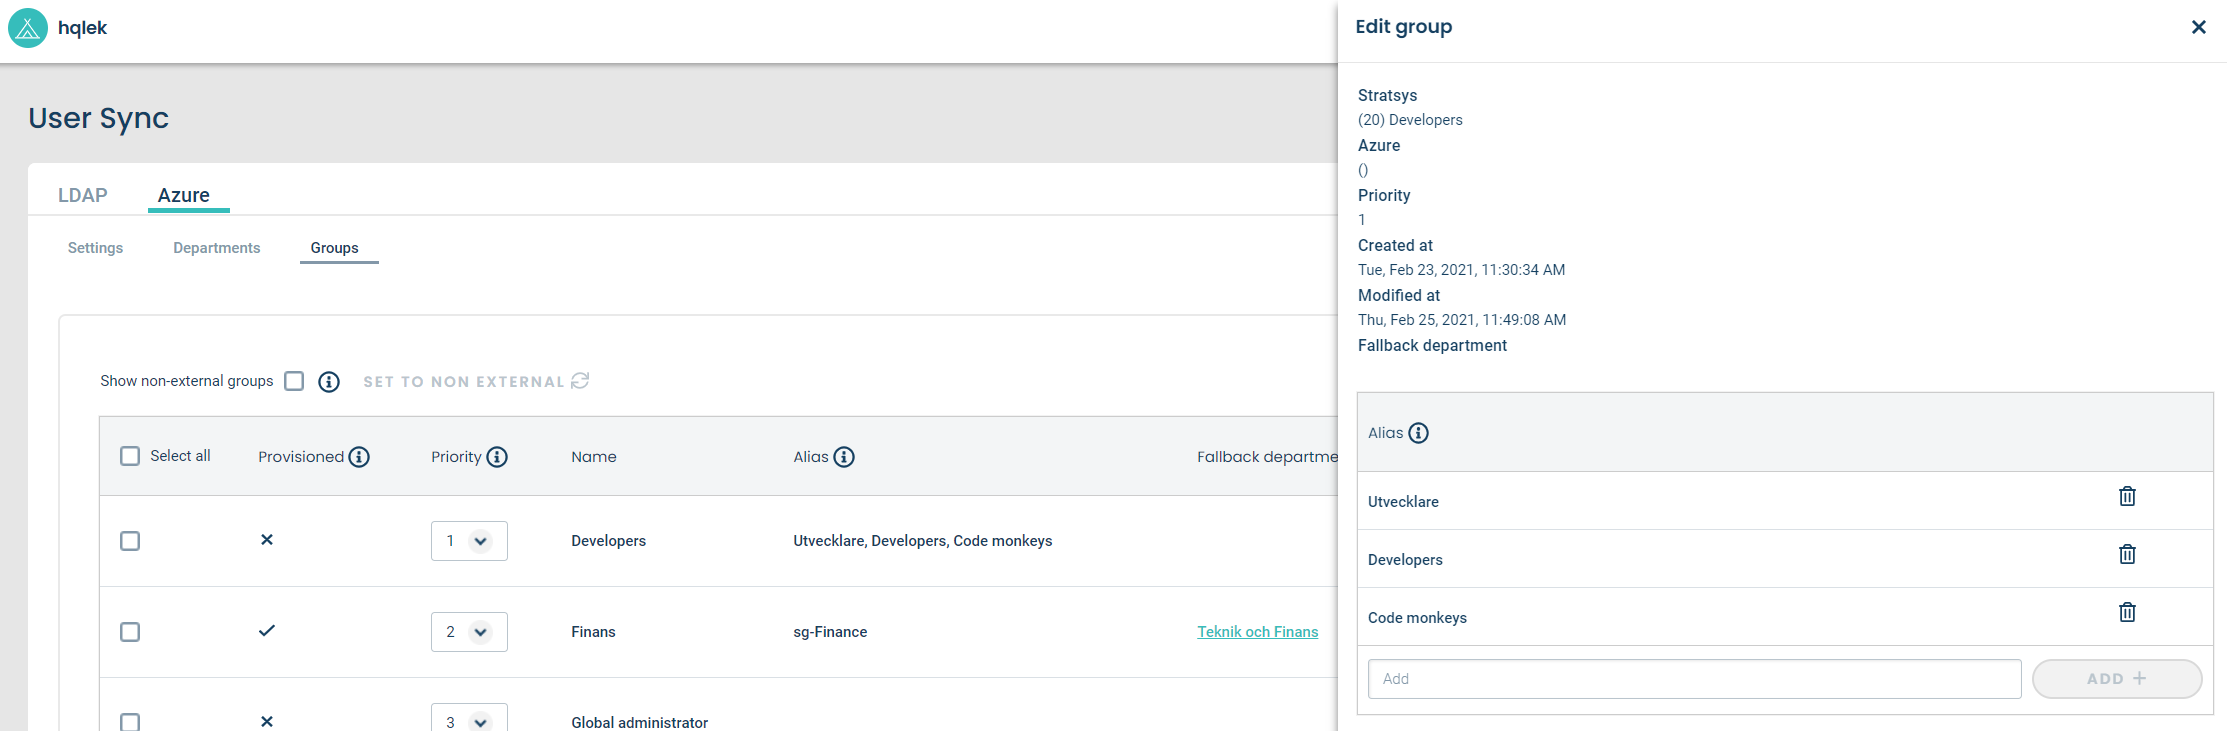
Fig. 4 Edit group.
Configure departments
- Departments also needs to have a corresponding alias, just as groups.
- Departments does not, however, need to be explicitly selected for provisioning (set as external). Instead they are automatically imported from Stratsys.
Create an Azure AD application
- Go to https://portal.azure.com . Select Azure Active Directory > Enterprise applications > New application
- Select Non-gallery application > Enter a name of your choice, for example StratsysAdSync, and click Add.
- Go to Provisioning > Get started
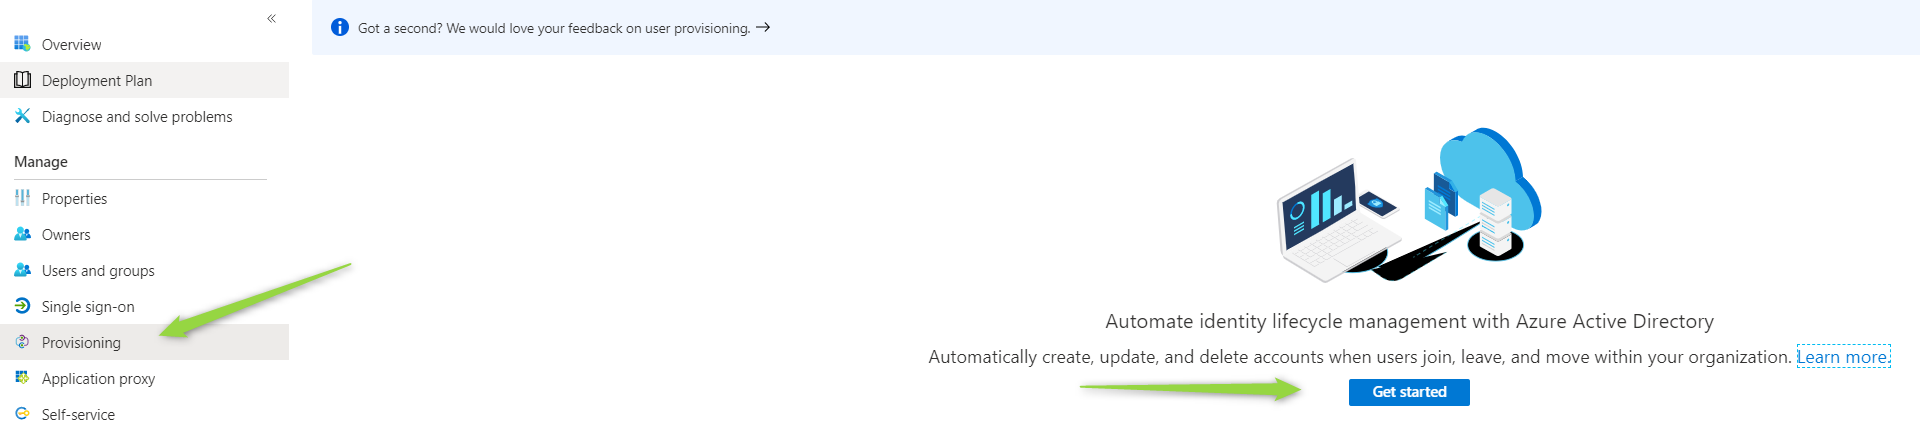
Fig. 5 New application in Azure AD.
- Pick Provisioning Mode Automatic
- Paste the Azure AD Sync url (1) previously copied from the platform administration.
- Paste the key (2) previously copied from the platform administration.
- Make sure the connection is correct by clicking Test connection (3). Azure should indicate that everything was fine (4).
- Press Save at the top of the page.
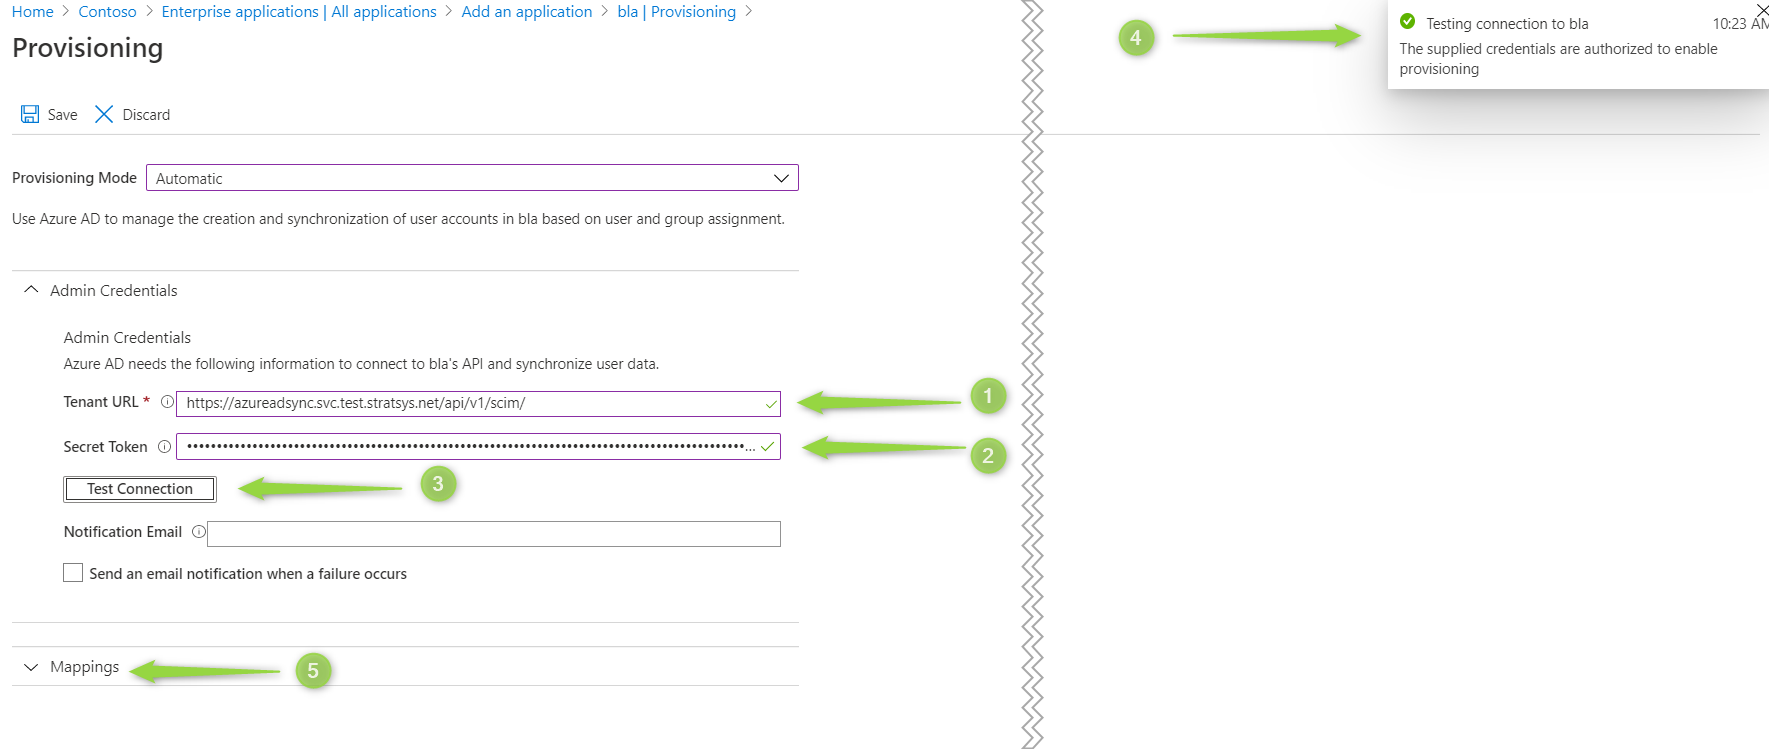
Fig. 6 Azure AD application configuration.
- Press Save at the top of the page.
Synhronize users and groups
1. Click Provisioning > Start provisioning. The synchronization will take a couple of minutes. 6. When the first cycle has finished you can see the outcome on the same page. Fig. 7 is an example of a not so successful run, since it has 19 errors. Check the logs under (1) and (2).
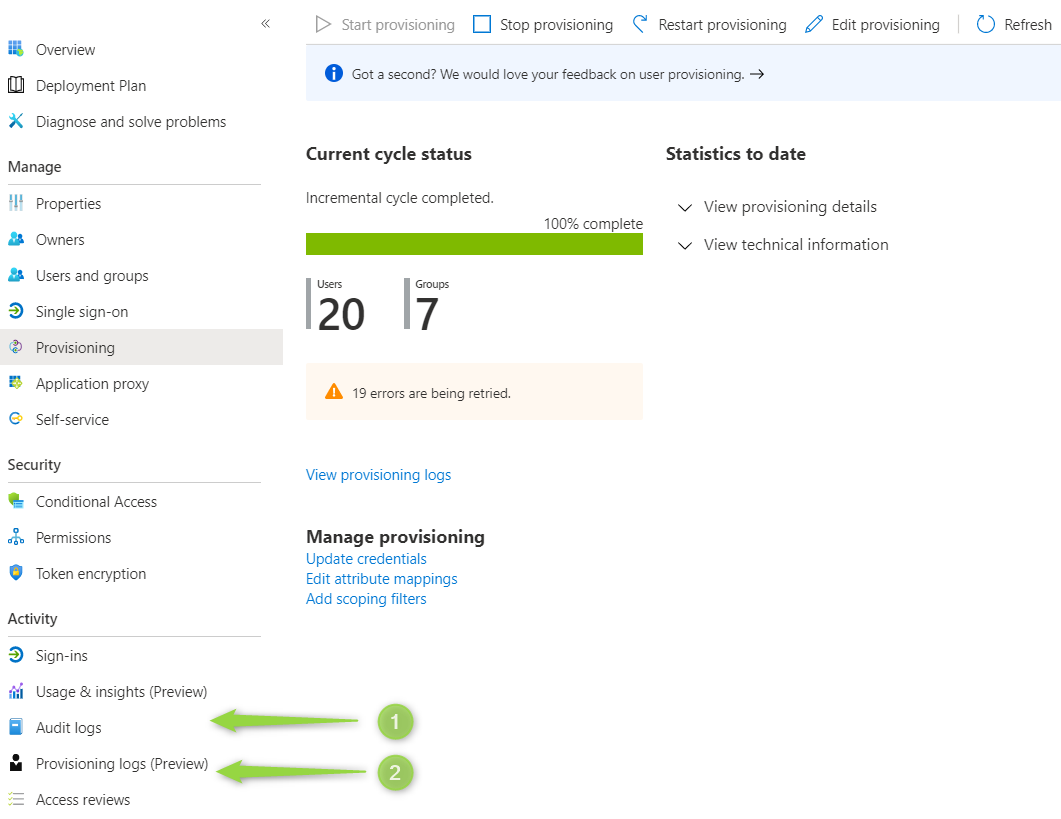
Fig. 7 Azure initial cycle.
Synchronization done
- If no error was reported, you’re done!
- Return to the Platform Administration > User Sync > Groups.
- You will now see your synchronized groups. They are marked as provisioned and has a Modified at and Created at.

Fig. 8 Synchronized groups.
- Go to Users and make sure all users has been synchronized.
Resources
- Check the logs: https://logging.stratsys.net/app/kibana#/discover/d6165770-d463-11e9-a9ab-1940d6e09d7a
- Troubleshoot: https://docs.microsoft.com/en-us/azure/active-directory/app-provisioning/application-provisioning-config-problem
- How provisioning works in Azure AD: https://docs.microsoft.com/en-us/azure/active-directory/app-provisioning/use-scim-to-provision-users-and-groups