OpenID Connect
- Enabled. If selected, the user can login using OpenID Connect.
- Standard. If selected, then OpenID Connect is the standard login method and will be used automatically when logging in.
- Display name. The text that is displayed to the users on the button for OpenID Connect.
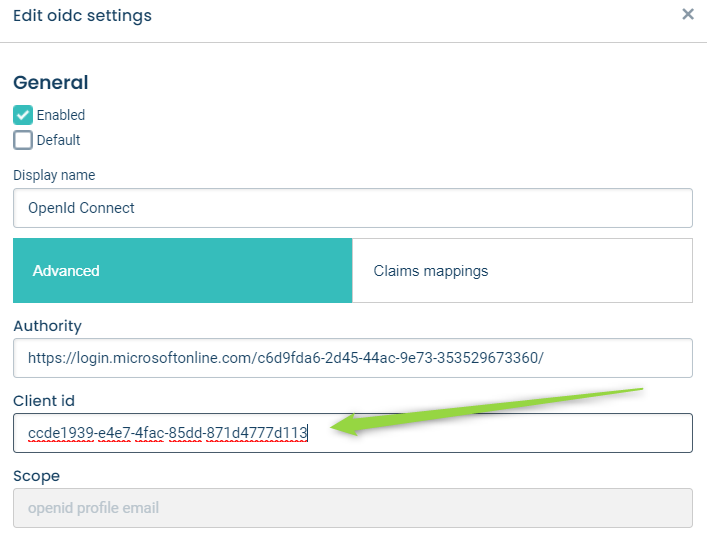
Advanced
- Authority. The authority url is the url to the issuer (or creator) of tokens.
- Client id. The client that is used when requesting tokens.
- Scope. The scopes are used to specify the access privileges when issuing a token.
Claims mappings
- Map claims from token response to platform user.
Note
Claims mapping is only used in just-in-time user provisioning.
Just-in-time (JIT) user provisioning
- Use just-in-time user provisioning to allow users logging in for the first time using single sign-on to automatically be created in the platform.
- The user is created according to the mapping made in claims mappings.
- Enabled by clicking User provisioning and click the Just-in-time user provisioning checkbox.
- Email falls back to Username if the latter is a valid e-mail address.
Note
Except for the fallback rules above, creation of users using user-provisioning follows the same rules as when creating user in the administration or using the api. This means that First name and Last name cannot be empty.
Configuration Azure AD
- Go to https://portal.azure.com
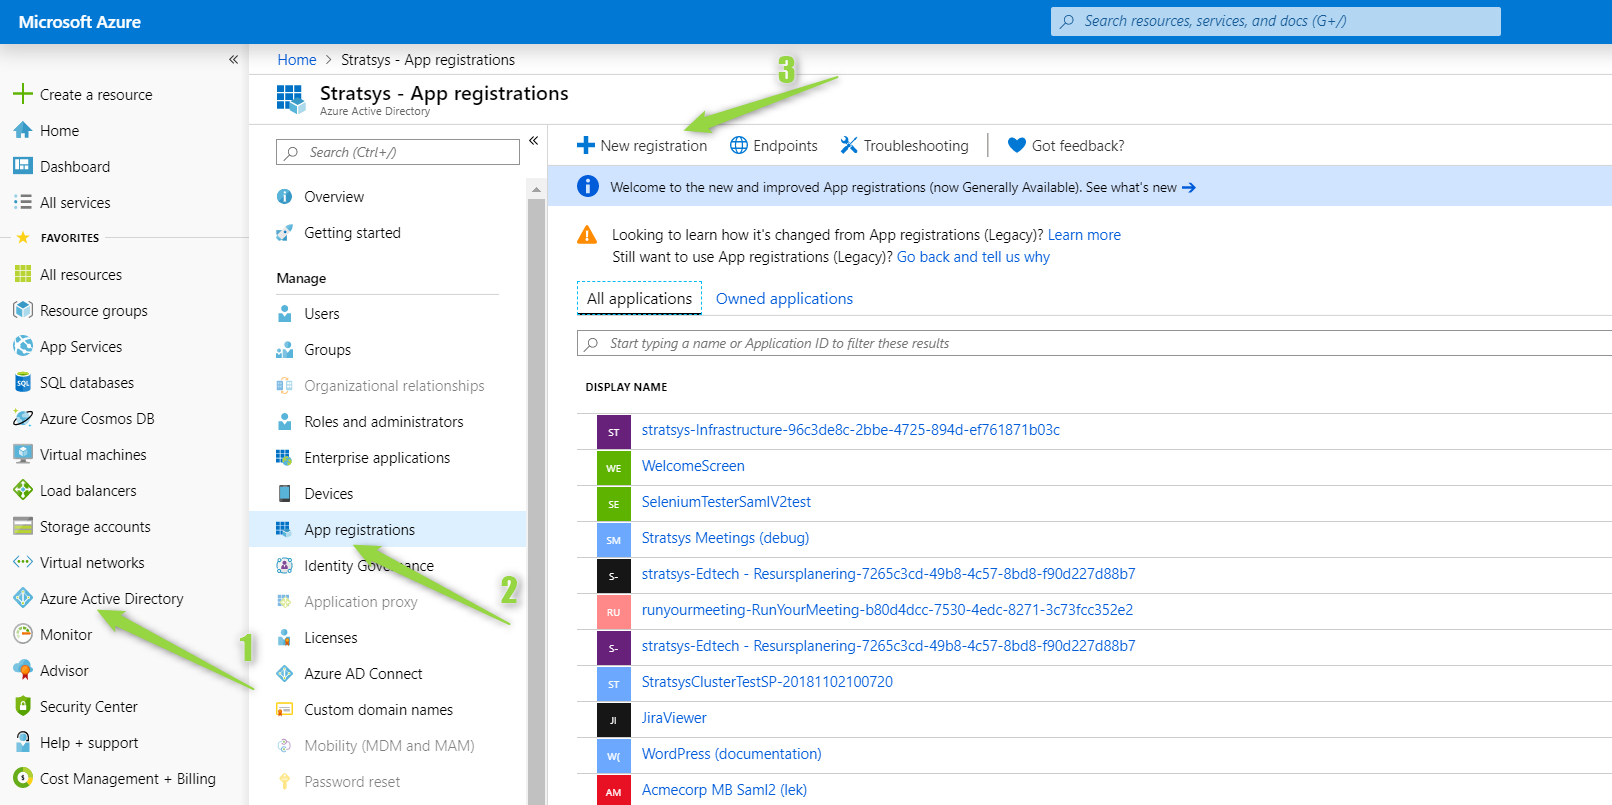
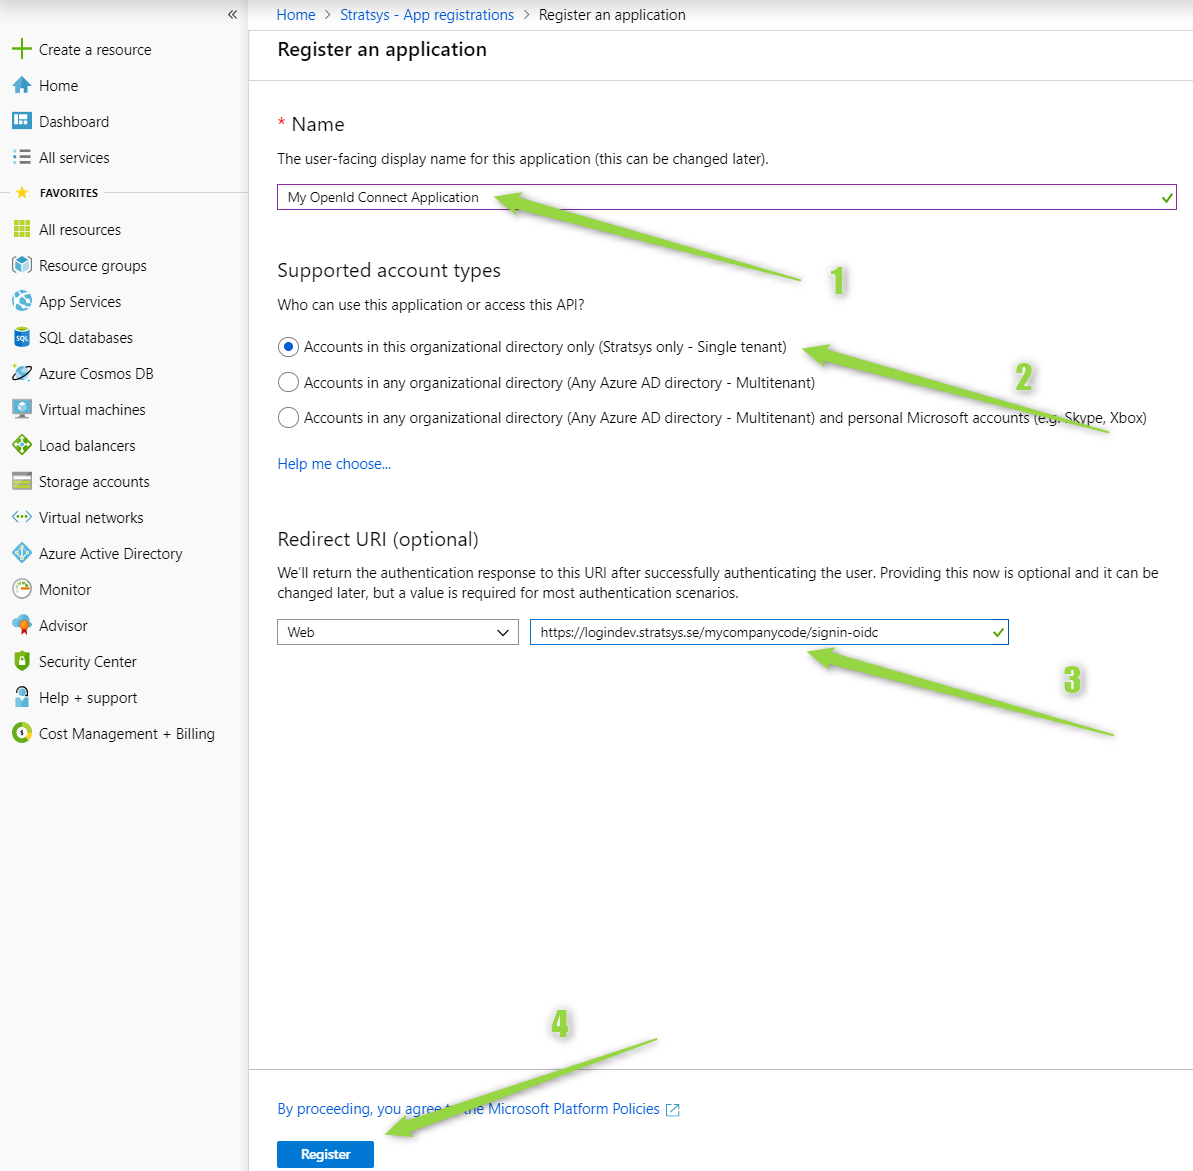
- Register an application - The Redirect URI should be set to the callback path (the path within the application’s base path where the user-agent will be returned).
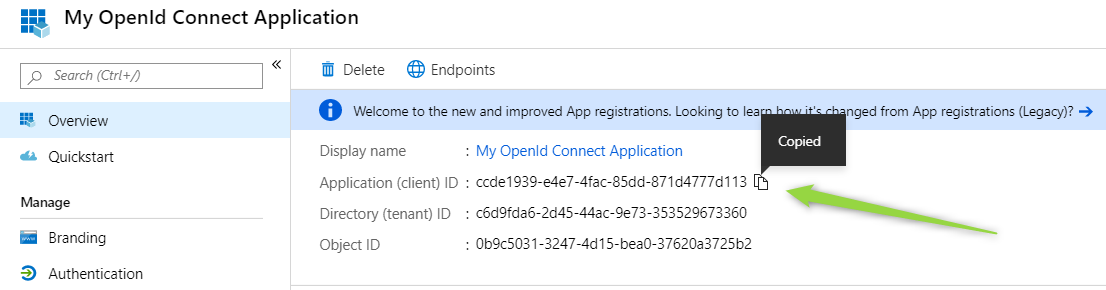
- Copy the
Application (client) IDand paste it in theClient idfield in the platform administration.
- You also need to enable ID tokens to be issued by the authorization endpoint.
